Thursday, November 21, 2013

Homemade Potato Skins

Cheese, bacon, potato. What's not to love? Throw some green onions and a dollop of sour cream and you've got yourself a well rounded meal. Forget about the calories and just eat yourself happy!

I decided to make a double batch of potato skins because I had two dinner parties last weekend. Let me tell you, they got scarfed down in rapid succession. If I concentrate really hard I can still taste the cheesy bacony goodness.

I really don't even think this requires a recipe.. But here's a willy nilly instruction set...

Bake some russet potatoes and let them cool. Cut in half lengthwise and scoop out the middles, leaving about a 1/4 inch of potato. If you like them skinnier, scrape out more potato. Keep the skins in the fridge until you are ready to use them. If you want to make them ahead, pop them in the freezer in ziplock bags.

Preheat your oven to 400. Line a pan with tinfoil. Place the potatoes upside down, so that the skins are face up. Brush them with olive oil and sprinkle with coarse salt and pepper. Bake for about ten minutes until they are quite firm.

Take them out and flip them akin side down and sprinkle your favourite cheese in each one. Don't be skimpy, there is no such thing as too much cheese! FYI: I used a tex mex mix. Next sprinkle them with bacon. It's obviously best if you fry the bacon and crumble it up, but pre-made bacon bits will do the trick.

Put it all back in the oven for ten minutes or until the cheese is bubbly. Sprinkle them with chopped green onions and serve with sour cream or greek yogurt!

Homemade Potato Skins Recipe
Homemade Potato Skins RecipeHomemade Potato Skins RecipeHomemade Potato Skins RecipeHomemade Potato Skins Recipe
Homemade Potato Skins RecipeHomemade Potato Skins Recipe


Tuesday, November 19, 2013

Shelly's Shepherds Pie

This is the very first shepherds pie I've ever made... which isn't that surprising because I've only liked shepherds pie for about a year! I used to hate my food touching, so shepherds pie was my worst nightmare. To this day, this food-touching anxiety creeps up on me and I have to talk myself down from the ledge and remind myself that it's my a big deal.

So the shepherds pie idea came to me out of pure necessity. I made potato skins last week and had a huge bowl of mashed potatoes to use up! Someone suggested shepherds pie, to which I gave them my yuck face. However, the idea grew on me, so I conducted some google research and decided to give it a try. Here's what it's all about...

Shelly's Shepherds Pie (Recipe adapted from Simplyrecipes.com)

Ingredients:
2 tbsps butter
1 white onion chopped
1 head of garlic minced (what? I like a lot of garlic!)
1 lb ground chicken (or more if you want it really meaty)
2 pkgs beef bouillon
1/ cup water
2 tablespoons Worcestershire (what a dumb word)
3 cups frozen mixed veg (peas, carrots, corn)
Salt and pepper
Mashed potatoes (I whipped mine with sour cream, then salt and peppered them)


Directions:
Preheat oven to 400•. Sautée onion and garlic until translucent, then add in chicken and cook until no longer pink. Add in Worcestershire and bouillon and season to taste. Then throw your vegetables in and let them cook for a couple of minutes. Throw the meat mixture jnto a 9 x 11 glass baking dish. Next is the in part, spread the mash potatoes over the meat and smooth it out or make it swirly, whatever you want. Bake it for 30 minutes. You can broil it at the very end if you're looking for a crispier top. Enjoy! Here's some pics...

Shelly's Shepherds Pie RecipeShelly's Shepherds Pie Recipe
Shelly's Shepherds Pie Recipe
Shelly's Shepherds Pie RecipeShelly's Shepherds Pie Recipe

Monday, November 18, 2013

Project New Bathroom Faucets

I've been living with my cruddy bathroom faucets for far too long. Now that my counter tops are pretty I figured it was time to get new taps. I scoured the interweb and found some reasonable priced ($50 a piece) easy-to-install ones from Home Depot. I've been careful to never do anything with plumbing so I was pretty nervous. I asked around for some advice, watched some YouTube Tutorials and then I studied the instructions for an hour. I felt well prepared to install this new faucet.

I opened up the bathroom cupboard and tentatively turn the water shut off valves off. There's a million terrible scenarios running through my head but turns out they are unwarranted/ the water shuts off with no scary business. Phewf.

Next I try to unscrew the plastic washers that hold the old faucet on. I can't budge either one of them. At no point in my imaginings did i think that taking Off the old faucet would be harder than putting in a new one. I try and try and then hurt my shoulder and give up. I decide (for lack of options) to wait until Nick comes over for the weekend.

I spend the next three days gazing longingly at my new chrome faucets sitting in their boxes. I tell them their time is coming soon, but they don't seem convinced.

Saturday afternoon, Nick arrives at Chalet Shelly. I point to the taps and ask him to have at 'er. In hindsight, I should've made him read the instructions. I also should've taken inventory on tools. Nick spends the next hour cursing. We dismantle the entire faucet head unnecessarily. At some point I go next door and ask Wendy if I can borrow some wrenches, which she so kindly lends me. (Note to Santa, I don't have any good wrenches or needle nose pliers!) Armed with the appropriate tools, swearing decreases immensely and progress increases rapidly. Win-win! Nick gets kind of soaked which is kind of funny, but other than that it all goes smoothly.

The next morning we work on the second bathroom which is almost a breeze and viola! my bathroom faucets are in and working and beautiful and I'm happy! Nick, on the other hand, is sore from being crammed under the counters for so long and claims he is going to have nightmares. But don't feel too bad for him, I made him a delicious grilled cheese sandwich for lunch!

Okay here's some before and afters. Try to contain your excitement, will ya?

Project New Bathroom FaucetsProject New Bathroom Faucets

Project New Bathroom FaucetsProject New Bathroom Faucets

 
Project New Bathroom FaucetsProject New Bathroom Faucets


Project New Bathroom Faucets


Wednesday, November 13, 2013

Cranberry Banana Oat Muffins

A freezer full of bananas and a bag of frozen cranberries lead me to this delicious recipe. They are super moist and packed with flavor. I ate them as a snack at work and didn't feel bad because there isn't really much sugar or fat in them. This recipe made about 24 small muffins. Give 'em a try, why don't ya?
Cranberry Banana Oat Muffins (Recipe adapted from food.com)
1 cup all-purpose flour
1/4 cup whole wheat flour
1 cup oats
2/3 cup granulated sugar
1 1/2 teaspoons baking powder
1 teaspoon baking soda
1/2 teaspoon salt
1/2 teaspoon cinnamon
1 egg
1 3/4 cups mashed ripe bananas (5-6 bananas)
1/3 cup butter or 1/3 cup margarine, melted
Zest of one orange or lemon
1 cup cranberries

Combine the first seven ingredients in a mixing bowl and mix well. Beat together egg, mashed bananas and melted butter or margarine until smooth. Add to dry ingredients. Stir to blend. Stir in cranberries just until combined. Spoon batter into prepared muffin pan, filling almost to the top. Bake at 375 degrees F for 20 to 25 minutes or until the top springs back when lightly touched.
cranberry banana oat muffins recipe


Tuesday, November 12, 2013

Project Countertop Resurfacing

I've spent a lot of time and energy hating my blue laminate bathroom countertops over the last few years. I wanted to replace them with granite, but it's way out of my price reach.

Recently, I came across a local company (Almega Resurfacing) who refinish counter in a granite-like look. It's essentially a resin that goes over top of your existing counters. For a reasonable amount of money I had both my bathrooms redone from the gross dusty blue color to a speckled black granite look.

I was ecstatic. Shiny and black and new.

The next day I went in to stare at them and noticed a smudge mark. I figured it was just dust. Nope, it was a paw print. I looked harder and there were a dozen of them and even some claw marks. Apparently Miss Watson didn't like my new counters.

I immediately fell to the floor crying like a child. When I had pulled myself (mostly) together I called my counter guy and told him what had happened. He was not happy about it but told me he would come try to fix it.

I shut the door and tried not to think about it.

A week or so later he came by and sanded out the paw prints and put another couple of top coats on it and they are all fixed! Even better, he did it free of charge. Here's some before and after pics...

Project Countertop ResurfacingProject Countertop Resurfacing
 Project Countertop Resurfacing
Project Countertop Resurfacing

Friday, October 11, 2013

Pumpkin Choclate Chip Cookies

In the spirit of Thanksgiving weekend, I'd like to thank chocolate and pumpkin for existing and being such a great team.

Last night I made a double batch of Pumpkin Chocolate Chip Cookies, or Chumpkin Cookies as I like to call them (as of three seconds ago). It's a super easy recipe that produces more of a cake like cookie. I love the spiciness of it with the sweetness of the chocoalte chips. This cookie is a huge winner and is rivalled by none other than my pumpkin swirl brownies (which I'll be making on Sunday).

Happy Thanksgiving, everyone!

Pumpkin Choclate Chip Cookies Recipe


Here's the recipe:
1 cup of canned pumpkin
1 cup white sugar
1/2 cup vegetable oil
1 egg
1 teaspoon baking soda
1 teaspoon milk
2 teaspoons ground cinnamon
1/2 teaspoon pumpkin pie spice 1 1/2 cup all purpose flour
1/2 cup whole wheat flour
2 teaspoons baking powder
1/2 teaspoon salt

1 table spoon vanilla extract
2 cups chocolate chips

Mix the pumpkin, sugar, oil, egg, spices and vanilla together by hand.Dissolve bakign soda into milk and add to bowl. Mix in dry ingredients. Add choclate chips. Put on cookie sheet by spoolful. Bake in 350 degree oven for 10+ minutes. I always test my cookies by poking them, if they bounce back then they are done.

Adapted from an Allrecipes.com recipe.

Friday, August 23, 2013

Caulk: A Sticky Tale

Disgusting. That is the only word that could be used to describe the state of my shower prior to this project. The caulking in my en-suite bathroom had gone mildewy and it was a sight to behold. I didn't take any pictures because I'm sure you would hold it against me. Unfortunately I didn't get the OCD cleaning gene out of the sisters. 

My first course of action was, of course, to check YouTube for tutorial videos. I watched a couple and I have to say they were the most boring YouTube'ing I have ever done. I hit Home Depot and grabbed some caulk and a caulking gun. Not gonna lie I felt pretty bad ass buying that gear. 

Grout removal time. My tactic was to use the exacto knife to cut all the way down each caulked seam, then go to each edge and try to slide the blade underneath. Some places it was really easy and some places it was impossible.

Then I cleaned the seams with a bleach and water mixture. Then I let it dry over night.... The next night I was scared and excited to start re-caulking! Not going to lie it took me about half an hour to figure out how to get the caulk and caulking gun to be friends. I'm surprised that thing doesn't come with directions. :|

Applying the caulk was simple, but sticky. About 3 minutes into it I, my clothes and the entire bathroom (exaggeration) was covered in silicon. I thought it would just wash off my hands, but it really didn't. I had to google how to get it off - apparently rubbing yourself with a plastic bag will do the trick; that or letting it dry and then just peeling it off. 

The results are amazing, it looks so fresh and clean. So good, in fact, that I decided to re-caulk my second bathroom! Viola, here's some progress photos...

Caulk: A Sticky Tale

Caulk: A Sticky Tale

Caulk: A Sticky Tale

Caulk: A Sticky Tale

Tuesday, August 20, 2013

Ahoy! It's a boy!

For a girl who doesn't have a baby nor likes to shower that much, I sure throw a great baby shower!

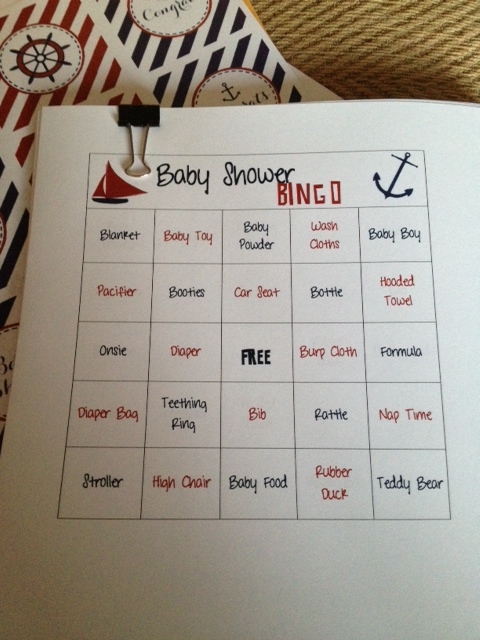
My twin sister, Amanda, is pregnant with a baby boy, so we decided on a nautical themed baby shower. Ahoy, it's a boy! I started crafting about a month ago, so that I didn't have to rush through everything. My wonderful neighbor lent me her hot glue gun which i burned my fingers on approximately 67 times. I made an Ahoy it's a boy pennant banner, food table tent cards, a baby shower bingo game, tissue pom pom balls for ceiling hanging, water bottle wraps, and sailboat sugar cookie goodie bags.

My mom, Lisa and Katie helped to overflow the food and desert tables with deliciousness; the highlights being Katie's pasta salad and Mom's meatballs. I have to say the brownies I baked were top notch - gooey and fudgey - definitely a keeper (will post later).

Amanda got a zillion or so presents that she loved. Not surprisingly, I think she already has all the baby clothes washed and put away! Damon was dressed in a nautical outfit, which was probably my favorite part of the entire day. Here's some a link to my BABY SHOWER BINGO document and some photos...


af